
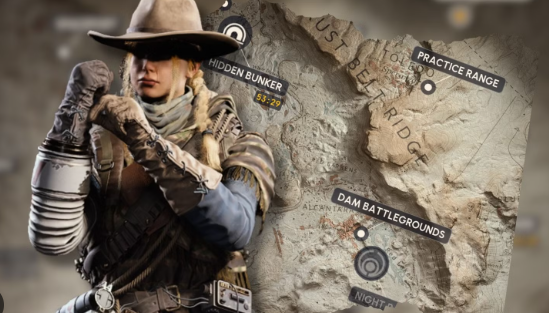
Mastering the maps in ARC Raiders can be the difference between a profitable extraction and losing everything in a single ambush. Every location in the game has its own rhythm, difficulty curve, and loot density. Whether you’re a new Raider learning the basics or a veteran hunting high-tier gear, understanding map flow is essential for maximizing your ARC Raiders Items and long-term progression.
This guide explains every playable map, how to unlock them, the best loot hotspots, and the map conditions that can dramatically change the outcome of your raid.
All Maps in ARC Raiders and How to Unlock Them
Each map in ARC Raiders gradually unlocks as you gain experience and complete matches. The early locations are designed for learning mechanics, while later maps introduce higher risks and significantly better rewards.
Dam Battlegrounds
Unlock Requirement: Available by default
Difficulty: Low
Dam Battlegrounds is the ideal starting map for beginners. It offers manageable PvE encounters, predictable enemy patrols, and relatively safe extraction points. For players who are just starting to collect ARC Raiders Items, this location provides a balanced environment where mistakes are less punishing.
Many experienced players still revisit this map to farm basic crafting materials or rebuild their inventory after a failed run.
Practice Range
Unlock Requirement: Play 4 rounds
Difficulty: Training Only
The Practice Range is a mechanics-focused training area where players can improve aim, test weapons, and experiment with movement. Unlike other maps, it does not feature loot or extraction mechanics.
While you cannot gather ARC Raiders Items here, the Practice Range is extremely useful for mastering recoil control and weapon familiarity before entering higher-risk environments.
Buried City
Unlock Requirement: Play 6 rounds
Difficulty: Medium
Buried City introduces tighter environments and more frequent close-range engagements. The urban layout creates natural chokepoints where ambushes are common.
This map also increases the chances of finding mid-tier ARC Raiders Items and crafting materials. Players who are actively progressing their gear should spend time learning the building layouts and escape routes here.
Spaceport
Unlock Requirement: Play 12 rounds
Difficulty: Medium to High
Spaceport significantly raises the stakes. Enemy density increases, and PvP encounters become much more common as players compete for premium loot zones.
Because of its higher loot tier, Spaceport is considered one of the best maps for farming rare ARC Raiders Items and valuable crafting components.
Many players targeting high-end equipment also farm this map while attempting to buy ARC Raiders Blueprints or complete crafting requirements faster.
The Blue Gate
Unlock Requirement: Play 18 rounds
Difficulty: High
The Blue Gate marks the transition into late-game content. The map features large open sightlines and exposed travel routes, making positioning and awareness extremely important.
However, the reward potential is equally high. Rare materials and valuable ARC Raiders Items frequently spawn here, making it one of the most profitable maps for experienced players.
Stella Montis
Unlock Requirement: Community Unlock
Difficulty: High
Stella Montis is a vertical, multi-layered map that emphasizes tactical positioning. Tight corridors and layered combat zones create numerous ambush opportunities.
Squads that coordinate effectively can farm rare crafting materials and high-value ARC Raiders’ Items here. However, solo players should move cautiously and plan extraction routes early.
Best Loot Locations on Every Map
Knowing where to find the most valuable loot dramatically improves both survival rates and extraction profits.
Dam Battlegrounds Loot Locations
Key farming spots include:
·Hydroponic Dome Complex
·Control Tower
·Research & Administration Building
These locations provide steady early-game resources that help players establish their crafting inventory.
Buried City Loot Locations
High-value structures include:
·Space Travel Hub
·Hospital
·Town Hall
These buildings frequently contain valuable crafting materials and opportunities to obtain new Blueprints.
Spaceport Loot Locations
Spaceport contains some of the most valuable loot clusters in the game:
·Departure Building
·Arrival Building
·Launch Towers
·Control Tower A6
·Container Storage
Players farming high-tier ARC Raiders Items often prioritize these locations, but they should expect heavy resistance from both Arc units and rival Raiders.
The Blue Gate Loot Locations
Top areas include:
·Pilgrim’s Peak
·Central Checkpoint
These zones offer excellent rewards but are also high-risk areas where PvP ambushes frequently occur.
Stella Montis Loot Locations
First Layer
·Seed Vault
·Sandbox
Second Layer
·Cultural Archives
·Medical Research
Because of the vertical layout, controlling stairwells and choke points is critical for surviving encounters.
Map Conditions in ARC Raiders
Map Conditions are dynamic modifiers that change gameplay mechanics, enemy behavior, and loot availability. Understanding these modifiers can greatly improve your survival strategy.
Hidden Bunker
A sealed bunker appears on Spaceport. Players must activate four antennas to unlock it. Extraction points become limited, increasing PvP encounters.
Lush Blooms
Natural resources spawn more frequently across the map. This condition is ideal for players focused on crafting runs rather than combat.
Night Raid
Visibility drops significantly, while Arc enemies become more aggressive. However, keys drop more often, and locked-door loot improves in quality.
Electromagnetic Storm
Lightning strikes can damage shields but may also disable Arc enemies temporarily. Smart positioning allows players to use the storm to their advantage.
Prospecting Probes
Arc Probes and Couriers spawn more frequently. This is an excellent opportunity to farm probe-specific crafting materials.
Husk Graveyard
Arc husks appear in higher numbers, providing more opportunities to breach and gather rare components.
Harvester Event
A massive Harvester machine spawns alongside a powerful Queen boss. This event is designed for coordinated squads seeking large-scale PvE rewards.
Cold Snap
A severe snowstorm forces players to stay under overhead cover to avoid environmental damage. Route planning becomes extremely important.
Hurricane
Strong winds reduce visibility and stamina efficiency. Debris can damage shields, but rare Raider caches may spawn during this event.
These caches can contain valuable crafting materials and occasionally rare Blueprints.
Blueprint Farming and Map Strategy
Recent updates have adjusted Blueprint drop rates, making efficient farming routes more important than ever. Maps like Spaceport, The Blue Gate, and Stella Montis remain the best places to search for high-tier crafting components.
Because Blueprint drops rely heavily on RNG, some players choose to buy ARC Raiders Blueprints through trading platforms rather than relying solely on in-game farming.
Regardless of your approach, efficient map routing dramatically increases your ability to gather rare ARC Raiders Items and progress your gear.
Final Tips for Efficient Map Progression
To maximize your success in ARC Raiders, keep these strategies in mind:
1. Start on Dam Battlegrounds to build early resources.
2. Move to Buried City and Spaceport once you acquire better gear.
3. Enter The Blue Gate or Stella Montis only when fully prepared.
4. Always check active Map Conditions before deploying.
5. Prioritize successful extractions over risky loot grabs.