
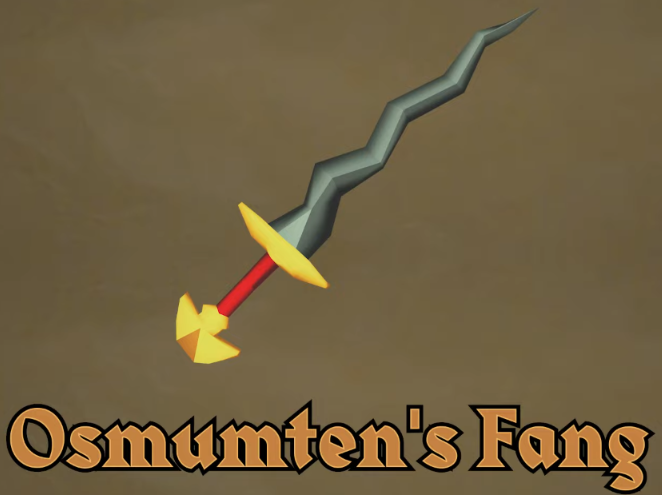
OSRS Osmumten’s Fang Guide: Why It Dominates PvE

Osmumten’s Fang has become one of the most reliable and widely used melee weapons in Old School RuneScape. Unlike traditional weapons that rely heavily on max hit potential, the Fang focuses on consistency and accuracy, making it a top-tier choice for high-defense bosses and endgame PvE content.

In this guide, we’ll break down what makes Osmumten’s Fang so effective, where it shines, and whether it’s worth the investment for your account. We’ll also explore how players fund this powerful weapon using OSRS gold and efficient progression strategies.

What Makes Osmumten’s Fang Unique?

The Fang stands out due to its special accuracy mechanic. Instead of relying on a single accuracy roll like most weapons, it effectively benefits from a double accuracy roll system, dramatically increasing the chance of landing successful hits.

This mechanic changes everything. While many weapons struggle against high-defense enemies, the Fang remains consistent, making it one of the most dependable melee weapons in the game.

Key Strengths of Osmumten’s Fang

1. Exceptional Accuracy

The Fang’s biggest advantage is its ability to land hits where other weapons fail.

·Performs extremely well against high-defense bosses

·Reduces the number of missed attacks

·Maintains steady damage output

In encounters where accuracy is critical, this weapon often outperforms alternatives simply by landing more hits.

2. Reliable DPS Over Time

While some weapons rely on high max hits, they can be inconsistent. The Fang, on the other hand, delivers:

·Stable and predictable damage

·Fewer “zero-hit” attacks

·Strong average DPS across long fights

This consistency is especially valuable in raids and boss encounters where sustained performance matters more than occasional burst damage.

3. One-Handed Versatility

Like many top-tier melee weapons, Osmumten’s Fang is one-handed. This provides flexibility in your setup:

·Equip a defender for increased offensive bonuses

·Use a shield for added survivability

·Adapt your gear based on the encounter

This versatility makes it easy to integrate into a wide range of builds and situations.

Best Uses in PvE Content

Osmumten’s Fang truly shines in high-level PvE, particularly against enemies with strong defensive stats.

Top Use Cases

·Tombs of Amascut raid

·God Wars Dungeon bosses

·High-defense Slayer monsters

·Group PvM encounters

In these scenarios, the Fang’s consistent accuracy translates into faster kills and more efficient runs.

Fang vs Other Melee Weapons

When compared to other popular melee weapons, the Fang offers a unique balance of reliability and performance.

Against Low-Defense Enemies

Weapons like the Abyssal Tentacle or Ghrazi Rapier may outperform the Fang due to higher attack speed or max hit potential.

Against High-Defense Enemies

This is where the Fang dominates:

·Outperforms many traditional melee weapons

·Provides steady DPS without relying on luck

·Reduces frustration from missed hits

Because of this, the Fang is often considered a “safe default” weapon for unknown or mixed-defense encounters.

PvP Viability: Not Its Strong Suit

Although Osmumten’s Fang is powerful, it is not designed for PvP.

·Lacks burst damage potential

·No strong knockout mechanics

·Better suited for sustained damage rather than quick kills

In PvP, weapons like the Voidwaker or Armadyl Godsword are generally more effective. The Fang remains firmly focused on PvE efficiency.

Gear and Stat Considerations

To maximize the effectiveness of Osmumten’s Fang, players should build around its strengths.

Important Factors

·High Strength level for increased damage output

·Strong melee accuracy bonuses

·Stab-focused gear setups

Optimizing your gear ensures that you get the most value out of the Fang’s accuracy mechanics.

The Cost of Osmumten’s Fang

As a highly desirable endgame weapon, the Fang comes with a significant price tag. Building an optimal setup around it can require a substantial amount of OSRS gold.

Common Ways to Earn Gold

·Bossing and raid farming

·Slayer tasks with profitable drops

·Flipping items on the Grand Exchange

However, these methods can take time. Many players who want faster access to endgame gear choose to buy OSRS gold through trusted marketplaces. This approach allows them to:

·Skip lengthy grinding sessions

·Acquire high-tier gear more quickly

·Focus on mastering PvE content

As always, it’s important to choose safe and reputable platforms if you go this route.

How the Fang Changed the PvE Meta

Before Osmumten’s Fang was introduced, players often had to rely on niche weapons or even switch to magic setups for high-defense encounters.

The Fang changed that by offering:

·A reliable melee alternative

·Consistent performance across multiple bosses

·Reduced dependence on situational gear

It doesn’t replace every weapon, but it fills a crucial gap in the melee arsenal-making it one of the most valuable additions to any player’s bank.

Is Osmumten’s Fang Worth It?

Worth It If You:

·Focus on PvE and bossing

·Frequently fight high-defense enemies

·Value consistency over burst damage

Less Ideal If You:

·Primarily engage in PvP

·Focus on low-defense content

·Prefer high-risk, high-reward playstyles

For most PvE-focused players, the Fang is absolutely worth the investment.

Final Thoughts

Osmumten’s Fang is one of the most intelligently designed weapons in Old School RuneScape. Instead of relying on flashy mechanics or extreme max hits, it delivers something far more valuable-consistency.

Whether you’re progressing through the Tombs of Amascut, farming bosses, or optimizing your loadout, the Fang provides dependable performance that few weapons can match.

And for players aiming to reach this level faster, responsibly choosing to buy OSRS gold can help bridge the gap between grinding and endgame readiness.

In a game where missed hits can cost time, supplies, and profit, Osmumten’s Fang stands out as one of the most reliable melee weapons available-making it a cornerstone of modern PvE success in OSRS.
The Best Way to Kill Steel Dragons in OSRS

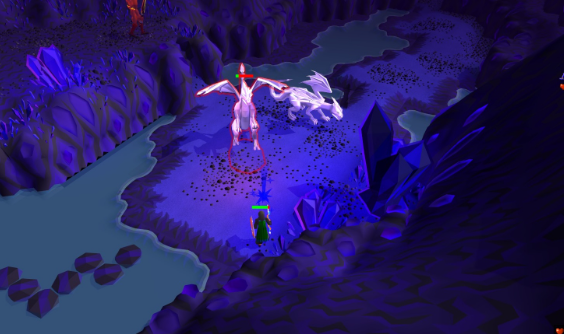
Steel dragons are one of OSRS’s most valuable mid-to-high-level monsters, beloved by players for their consistent drops of dragon bones, steel bars, and rare items like dragon platelegs or plateskirt. But these level 246 draconic foes are no easy target-they boast high defense, powerful melee attacks, and deadly dragonfire that can decimate unprepared players.

To kill steel dragons efficiently and safely, you need the right combat style, gear, location, and strategy. This guide breaks down the best methods, from melee to magic, along with key tips to maximize kills per hour (KPH) and minimize risk. And it makes it easier for you to obtain OSRS gold and other rewards.

Prerequisites for Killing Steel Dragons

Before facing steel dragons, ensure you meet these core requirements to avoid unnecessary deaths and slow kills.

Combat levels are non-negotiable: aim for at least 70 Attack, 70 Strength, and 70 Defence for melee; 70 Magic for magic setups; or 70 Ranged for ranged builds. Higher levels will drastically improve your KPH.

Dragonfire protection is essential. Steel dragons’ fire breath can hit up to 50 damage unprotected, so always bring an anti-dragon shield (or dragonfire shield) and super antifire potions-regular antifire potions are insufficient for consistent protection.

Most steel dragon locations are members-only, so free-to-play players cannot kill them directly and must trade for their drops. Additionally, some spots require quest progress, such as Shilo Village for Brimhaven Dungeon access.

The Best Combat Styles for Killing Steel Dragons

Steel dragons have distinct weaknesses: they take 50% more damage from earth spells and are vulnerable to stab attacks. The best combat style depends on your gear, skill levels, and whether you’re on a slayer task.

1. Melee: The Most Efficient Method (Slayer Tasks)

Melee is the fastest way to kill steel dragons, especially when on a slayer task (which grants a 5% XP bonus). The key is using stab weapons, as steel dragons have high slash defense but lower stab defense.

The dragon hunter lance is the best weapon-its 20% damage boost against draconic creatures makes it far superior to other options. If you don’t have it, use Osmumten’s fang or a ghrazi rapier for high stab bonuses.

For gear, prioritize high-defense armor like Bandos or Torva to reduce melee damage. A slayer helmet (imbued if possible) boosts accuracy and damage, while an amulet of torture or rancour enhances strength.

Melee setups can achieve 240+ KPH with good gear, making them ideal for slayer tasks or profit-focused grinding.

2. Magic: The Safest Method (No Slayer Task)

Magic is perfect for players who want to avoid close combat or don’t have top-tier melee gear. Steel dragons are weak to earth spells, so use Earth Wave (level 75 Magic) or Earth Surge (level 95 Magic) for maximum damage.

Equip magic armor like Ahrim’s Robes or Ancestral Robes to boost magic accuracy and damage. A slayer’s staff (e) or trident of the seas (or swamp) works well, and an amulet of power or fury enhances magic stats.

3. Ghorrock (Wilderness Option)

Ghorrock, in the northwest Wilderness, has several steel dragon spawns. Access requires progress in the Temple at Senntisten quest, and the area benefits from the Stone of Jas’s damage boost.

This spot is risky due to Wilderness PvP, but the damage boost makes kills faster. Use fairy rings (code DKS) to teleport nearby for quick access.

4. Kuradal’s Dungeon (Slayer Task Only)

Kuradal’s Dungeon has 4 steel dragons, tightly grouped for fast kills. Access requires the dragon to be assigned as a slayer task by Kuradal or Morvran.

The dungeon is close to a fairy ring (code BJQ), and the ferocious ring grants a damage bonus here. Cannons are not allowed, but the grouped spawns make melee setups highly efficient.

Essential Gear and Inventory Setup

Your gear and inventory can make or break your steel dragon grind. Here’s what to bring for each combat style:

Melee Inventory

Bring 4-6 super antifire potions, 1-2 super attack and super strength potions, and food (sharks or anglerfish). Add a bonecrusher to auto-bury dragon bones, and magic notepaper to note steel bars.

A pack yak (beast of burden) is highly recommended to carry more supplies, reducing bank runs.

Magic Inventory

Pack earth runes, water runes (for Earth Wave), super antifire potions, super magic potions, and food. A spring cleaner can auto-alch low-value drops to save inventory space.

Key Gear Add-Ons

A ring of wealth increases rare drop chances (like dragon platelegs), while a dragonfire shield reduces dragonfire damage further. For slayer tasks, a slayer helmet (imbued) is a must.

Pro Tips for Maximizing Efficiency

Follow these tips to boost your KPH and profit:

Always use super antifire potions-never rely on regular antifire, as it won’t fully protect you from steel dragonfire. Refresh the potion before it runs out to avoid taking heavy damage.

Focus on one dragon at a time. Steel dragons respawn in 8.4 seconds, so you can chain kills without waiting if you clear them quickly.

Use a bonecrusher and magic notepaper to keep your inventory clear. This lets you stay in the area longer before banking, increasing hourly kills.

If on a slayer task, use a slayer helm and accept the 5% XP bonus-this also slightly boosts drop rates for rare items.

Avoid using slash weapons for melee-steel dragons have high slash defense, so stab weapons are far more effective.

Why Kill Steel Dragons? Profit and Rewards

Steel dragons are highly profitable, with an average hourly profit of 150,000-200,000 GP. Their 100% drops include dragon bones (2,303 GP each) and 5 steel bars (2,700 GP total). If you want more gold, you can also choose to purchase cheap RuneScape gold to acquire it quickly.

Rare drops include dragon platelegs and plateskirt (1/512 chance each), rune axes, and dragon javelin heads (after completing Monkey Madness II). These can boost profits significantly.

They also grant 971.8 combat XP and 320.6 prayer XP per kill (if burying dragon bones), making them a great way to train multiple skills.

Final Thoughts

The best way to kill steel dragons depends on your playstyle: melee is fastest for slayer tasks, magic is safest for casual players, and ranged is a solid alternative. Regardless of your choice, prioritize dragonfire protection, stab/magic accuracy, and a good location.

With the right gear, strategy, and location, you’ll be able to kill steel dragons efficiently, profit consistently, and master one of OSRS’s most rewarding mid-level monsters. Gear up, grab your super antifire, and start slaying-your dragon bones and rare drops await.

OSRS Giant Foundry Guide:Level Your Smithing Efficiently

The Giant Foundry is a game-changing mini-game in Old School RuneScape that offers one of the most efficient ways to train Smithing. Whether you’re chasing level 99 or simply looking for a more engaging alternative to the traditional anvil grind, the Giant Foundry delivers solid XP, a unique gameplay loop, and worthwhile rewards.

This guide breaks down everything you need to know—from unlocking the activity to mastering its mechanics—to ensure you make the most of every trip to the foundry.

To get started, you must complete the Sleeping Giant quest. It’s a short introductory quest that teaches you the basics of the Giant Foundry and unlocks access to the mini-game.

After completing the quest, you can immediately begin using the foundry to create massive blades, earn Smithing experience, and accumulate Foundry Reputation to spend on useful gear and resources.

Unlike regular Smithing, which involves smelting bars and crafting gear at an anvil, the Giant Foundry tasks you with forging giant swords from metal alloys. The process is more interactive, requiring precision and timing to produce high-quality blades.

Core Mechanics:

Bar Input: You’ll combine 14 metal bars per sword. Different bar types (e.g., steel, mithril, adamantite, rune) influence the quality and complexity of the sword.

Mould Selection: Each day features a rotation of blade moulds. These determine the ideal bar combinations and crafting difficulty.

Blade Creation Process: You’ll move your sword through various stations—pouring, shaping, cooling, grinding, and polishing—while managing the blade’s temperature and progress.

Reputation & Rewards: Each completed sword earns coins, XP, and Foundry Reputation, which can be exchanged for unique items and tools.Level up your game with instant OSRS gold from RSgoldfast. Experience unparalleled quality and customer support – your adventure starts here!

Strategies for Optimal XP and Rewards

1.Inventory Setup

    Start with a smart inventory. Your setup should include:

    14 Metal Bars: Choose a combo that fits today’s moulds. Popular combinations include:

    Steel + Mithril (budget-friendly)

    Mithril + Adamant (balanced)

    Adamant + Rune (high XP)

    Cooling Gear (optional): Ice gloves are not needed, but stamina potions may help during long sessions.

    Mould (if unlocked): Always bring the best mould available for the current rotation.

    2.Temperature Management

      The mini-game heavily revolves around keeping your blade in the optimal temperature range:

      Shaping (Trip Hammer): Best performed when the blade is hot.

      Grinding: Requires a cooler blade—let it rest or cool it actively.

      Polishing: Should only be done once the sword is fully cooled.

      Stay in the “green zones” for each step to maintain high blade quality and maximize rewards.

      3.Focus on Reputation Rewards

        Spend your Foundry Reputation wisely. Top priorities include:

        Smiths Outfit: Grants a bonus to all Smithing XP when worn.

        Mould Upgrades: Unlock better sword types for faster XP per run.

        Ore Packs: Especially valuable for Ironmen looking to stockpile smithing materials.

        Double Ammo Mould: Tradeable and a great money-maker for mains.

        Tips for Time & Resource Management

        Always Check the Daily Moulds: Use the mould interface to ensure your bars match the day’s options.

        Batch Your Bars: Smith bars into swords in bulk to reduce trips to the bank.

        Use Foundry Plugin (RuneLite): Enables temperature alerts and progress tracking.

        Avoid Overheating or Overcooling: Timing is everything—too much deviation lowers your blade quality and rewards.

        Avoid these pitfalls that can hinder your XP gains:

        Wasting Bars on Poor Moulds: Always match your bar types to today’s active moulds.

        Letting the Blade Drop Out of Range: Mismanaged temperature = lower XP and coins.

        Ignoring Reputation: Don’t overlook the long-term benefits of reward unlocks.

        Crafting Without Checking Smithing Level: Higher levels unlock better bar combos and more efficient forging.

        The Giant Foundry is an efficient, rewarding, and enjoyable method for training Smithing in OSRS. With its engaging mechanics and worthwhile reward system, it’s far more than a simple mini-game—it’s one of the best paths to maxing your Smithing skill.

        By bringing the right bars, mastering the blade stations, and staying active in the OSRS community, you can make every foundry session count. Stick with it, and level 99 Smithing will be well within your reach.

        Need help stocking up on bars or gold to support your forging journey? Consider safe and fast cheap Runescape gold from RSgoldfast to keep your training uninterrupted.

        OSRS King’s Long Questline – Start Quest Walkthrough

        The world of Old School RuneScape is rich with quests that offer immersive storytelling and thrilling gameplay. One such quest is Start Quest, set against the backdrop of the enigmatic Sinclair Mansion. This guide will take you through every step of this gripping mystery, ensuring you uncover all crucial details along the way.

        Beginning the Investigation

        Your adventure begins outside Sinclair Mansion, where an eerie atmosphere looms over the estate. The grand structure, steeped in history, is now the center of a chilling mystery. Speak with Gossip, a local informant who shares shocking news—Anna Sinclair has been accused of murdering her father, Lord Sinclair.

        Before diving deeper into the case, gather as much context as possible. Gossip will recount his version of events, shedding light on the Sinclair family’s tangled history and Anna’s alleged involvement. His information sets the tone for the investigation and hints at underlying tensions within the family.RSgoldfast: The fastest way to earn OSRS gold and improve your gaming experience!

        Seeking Additional Clues

        After speaking with Gossip, approach a nearby guard. He harbors doubts about the official story, hinting at a larger conspiracy. The guard suspects that the Sinclair family might be scheming to reclaim Camelot, a significant claim given that Lord Sinclair had once sold Camelot to King Arthur. His suspicions add another layer of intrigue, compelling you to dig even deeper.

        However, this investigation won’t be easy. The Council of Seers, an influential governing body, has forbidden further inquiries into the case. Despite this restriction, your role as the investigator makes you the only person capable of uncovering the truth.

        Exploring the Sinclair Mansion

        Once you’ve gathered information from Gossip and the guard, it’s time to enter Sinclair Mansion. The grand entrance is both imposing and foreboding, hinting at the dark secrets hidden within. As you step inside, silence fills the halls, broken only by the creaking of the old wooden floors.

        Explore the various rooms carefully—each one may hold vital clues. Pay close attention to books, paintings, and artifacts, as they might provide insights into the Sinclair family’s past and potential motives.

        Interrogating Key Characters

        During your search, you’ll encounter several key figures within the mansion. Engaging them in conversation will provide multiple perspectives on the murder and the Sinclair family’s troubled history.

        Anna Sinclair (The Accused): You may find Anna in a secluded part of the mansion. Her reaction could range from defensive to distressed. Listen closely to her account of the events leading up to the murder—her testimony could hold clues that either prove her innocence or reveal a new suspect.

        Other Family Members & Staff: Throughout the mansion, you’ll encounter individuals with their own opinions on the Sinclairs’ legacy. Speaking with them could help you piece together the bigger picture.

        Piecing Together the Mystery

        As your investigation unfolds, it becomes clear that things are not as they seem. The Sinclairs have a history filled with secrets, betrayals, and hidden ambitions. To make sense of it all, you must think critically about the evidence you gather.

        Helpful Tips:

        Take notes on key conversations, peculiar items, and inconsistencies in the stories you hear.

        Examine the motives behind each character’s statements.

        Compare evidence to identify contradictions or hidden truths.

        With enough information, it’s time to confront the major players in this case. These confrontations will trigger a series of revelations that could shift the course of your investigation and determine Anna’s fate.

        Expect unexpected twists as you close in on the true culprit. The mystery may challenge your initial assumptions, and your choices during key moments could impact the quest’s resolution. Will you prove Anna’s innocence, or will the evidence lead you to an entirely different suspect?

        Come and achieve your goals in Old School RuneScape. buy RS gold from RSgoldfast and start your adventure! The Start Quest in OSRS is more than just another task—it’s a deep dive into storytelling, character dynamics, and the consequences of your actions. With Sinclair Mansion as the stage, this tale of deception and truth will keep you engaged from start to finish.