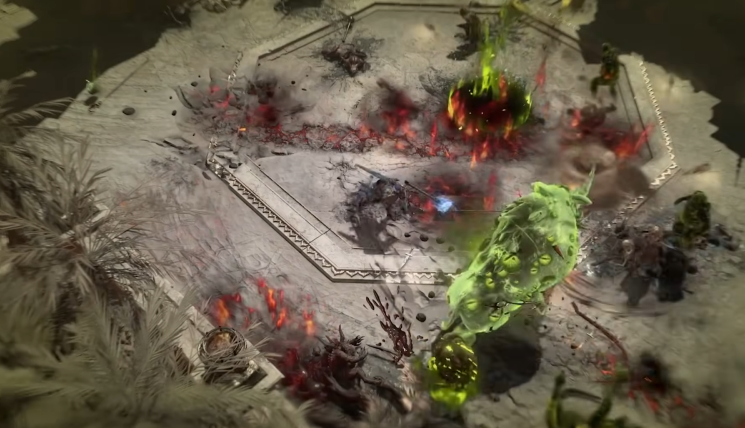
Diablo 4 Gold Farming Guide: Best Methods

Diablo 4 Gold is no longer a trivial currency -especially in 2026 and Season 13. With the Lord of Hatred expansion, endgame activities like master working, affix rerolling, and paragon resets drain gold at an alarming rate. A single master working reroll can cost millions, and ignoring gold farming will quickly halt your character’s progression. Fortunately, there are reliable, efficient methods to farm gold safely (no scams or bans) that work for solo players and group grinders alike. Below are the best gold farming methods to stockpile wealth fast.

1. The Whispers and Vendor Loop: Best for Solo Players

The Whispers of the Dead loop is the easiest and most consistent method for solo players, requiring no high-end gear or group coordination. It balances simplicity and reward, making it perfect for players of all skill levels.

To start, open your map and look for green leaf icons-these mark Whispers of the Dead objectives. These tasks are quick: kill a local boss, clear a cellar, or complete a small world event. Collect 10 Whispers to earn a Great Cache, which is packed with rare (yellow) items and occasional legendaries.

The key to maximizing gold here is selling every yellow item to a vendor-do not salvage them. Each yellow item sells for 30k to 80k gold, and a full inventory (33 items) nets roughly 1.5 million gold. A single Whispers loop takes 10–15 minutes, so three loops can earn you 4–5 million gold in under an hour.

Pro tip: Equip gear with “+% Gold Find” on your helmet or amulet. Even a small boost adds up quickly, increasing your total earnings per loop significantly.

2. Helltide Living Steel Farming: High-Volume Rewards

Helltide zones are now active almost constantly, making them a top-tier gold farming spot. This method not only yields gold but also valuable materials, doubling your rewards for the same effort.

When in a Helltide zone, focus on collecting Cinders to open Tortured Gift of Living Steel chests (costing 75 Cinders each). These chests drop dozens of rare items, plus Living Steel-used to summon the ladder boss Grigoire.

Sell all yellow items to vendors for immediate gold. A full 55-minute Helltide run can earn 6–8 million gold just from selling rares. Additionally, Living Steel can be sold to other players for extra gold, boosting your earnings even more.

This method works best with fast-clearing builds, as more Cinders collected mean more chests opened and more gold earned.

3. Legion Events: Quick, Low-Effort Gold

Legion Events are often overlooked, but they are one of the fastest ways to earn gold with minimal effort. These events spawn every 25–30 minutes (marked by three swords in a circle on the map) and take just 3–5 minutes to complete.

Join the event, defeat three waves of enemies, and take down the final boss. A large chest will spawn, dropping 12–18 rare items, elixirs, and sometimes legendaries. Sell all rares to vendors for 700k–1 million gold per event.

To scale this method, teleport to a different town hub after each event to reset the instance. Do a quick Whisper or two while waiting for the next Legion Event, and you can earn 2.5–3 million gold per hour with almost no burnout.

4. Kurast Undercity: Late-Game Gold Boost

For players in the late game with the Lord of Hatred expansion, Kurast Undercity is a timed dungeon activity that offers massive gold rewards when optimized. It works best as a secondary method alongside Whispers or Helltide runs.

Before entering, use the Tribute of the Horadrim to modify rewards and target talisman items and seals-selling these can yield millions of gold per run. Invest skill points in War Plans to spawn Portal Pranksters, which increase the number of reward chests at the end.

Focus on clearing enemies quickly to build attunement, which scales your final rewards. The faster you clear, the more gold and valuable items you’ll earn from the end-of-run chests.

5. Infernal Hordes: Direct Gold Conversion

Infernal Hordes is one of the strongest direct gold farming activities, ideal for fast-clearing builds with strong AoE damage. This wave-based mode lets you collect Burning Aether, which can be converted directly into gold at the end of the run.

The difficulty scales with your world tier, so adjust it to match your build’s strength. Higher tiers yield more Aether, which translates to more gold when converted to Spoils of Gold. You’ll also earn rare and legendary items during runs, which can be sold for extra gold.

With a optimized build, you can earn around 30 million gold for 800 Aether collected, making this a top choice for endgame players looking to maximize gold per hour.

Key Tips to Maximize Gold Farming

First, avoid gold drains: stop re-rolling affixes more than 3 times (costs skyrocket after that), don’t upgrade every legendary, and never buy common cheap D4 materials from vendors-salvage them instead.

Second, stack Gold Find: use the Practiced Technique set and a Legendary Horadric Seal with a +900% Gold Drop rate (via the Horadric Cube’s 3-to-1 reroll recipe) to boost earnings exponentially.

Finally, prioritize efficiency: focus on methods that match your build’s strengths. Fast builds excel at Helltide and Legion Events, while tankier builds can handle Kurast Undercity and Infernal Hordes.

By using these methods consistently, you’ll never run out of gold for endgame progression. Whether you’re a solo player or part of a group, these strategies will help you farm gold safely, efficiently, and without burnout.

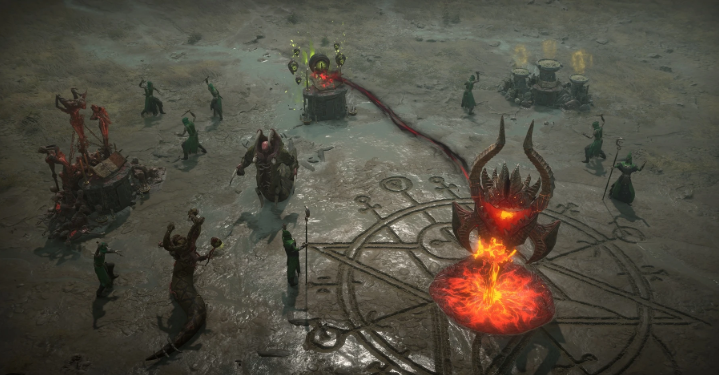
Diablo IV: Lord of Hat Guide – The Lair Boss Skill Tree & Nemesis Layers

With the Lord of Hat expansion, Blizzard has completely overhauled the endgame bossing loop. The new Lair Boss Skill Tree allows you to spend points to modify how Lair Bosses behave, what they drop, and—most importantly—unlock a secret chain of Nemesis Layers that culminates in the ultimate challenge. Important Note: Not all nodes have been discovered yet. This guide covers all confirmed nodes from review copies. As more info drops, expect even more branches on this tree. If you want to speed up your progression, you can buy Diablo 4 Gold to acquire keys and materials faster, but mastering the Nemesis system is still the key to the best loot.

1. Core System Changes: Lair Boss Keys & Monster Power

Before diving into the tree, understand the new fundamentals:

· Lair Boss Keys: No more boss-specific materials (e.g., Shards of Agony). Now there are only two key types:

o Lair Boss Key – for starter bosses (e.g., Varshan, Grigoire).

o Greater Lair Boss Key – for top-tier bosses (e.g., Duriel, Andariel).

· Monster Power (MP): A new affix on certain nodes. Each +1 MP increases a monster’s Life, Damage, but also Experience and Rewards. Higher risk, higher reward.

2. The Lair Boss Skill Tree – Left Side (Efficiency & Loot)

The left side focuses on making your standard boss kills more rewarding and faster.

Node 1: Lair of Runes (First node, far left)

· Effect: Lair Bosses have +1 Monster Power and a higher chance to drop specific runes.

· Strategy: Each Lair Boss now has a dedicated rune drop table, similar to unique items. Take this early for rune farming.

Node 2: Lair of Plenty (Further down left)

· Effect: Lair Bosses have +1 Monster Power. Gain +1 Horde Chest when you slay a Lair Boss.

· How it works: Horde Chests are the chests that appear after a boss kill (requires a key to open). This node gives you an extra chest.

· Strategy: Speeds up key usage by 2x. If you have 50 keys, this node makes it feel like 100 kills. Essential for efficiency farming.

3. The Green Nodes – Invading Other Content

These nodes integrate Lair Bosses into other endgame activities. No more monotonous boss rotations.

Node: Baron’s Vengeance

· Effect: Varshan and his minions can now appear in a Chaos Wave within Infernal Hordes. After killing him there, the Spoils of Greater Equipment may drop his unique items.

· Strategy: Adds variety to Hordes. Pick Chaos Waves whenever possible if you need Varshan’s loot.

Node: Blood of Bartuc

· Effect: The Fell Council in Infernal Hordes has +1 Monster Power. After defeating the Council, Spoils of Greater Equipment may drop unique items associated with Bartuc (a new Lair Boss?).

· Strategy: Makes the Fell Council harder but more rewarding, and adds a new source for Bartuc’s loot table.

4. The Middle Section – THE NEMESIS SYSTEM (NEW UBER BOSSES)

This is the centerpiece of the expansion. A chain of RNG-based portals that lead to multi-boss fights.

Node: 2x Two (First node in middle section)

· Effect: After opening a Horde Chest, there is a low chance a portal will open to the Nemesis Layer, where you fight two Initiate Lair Bosses at once.

· Initiate Bosses: The starter tier (Varshan, Grigoire, Beast in Ice, etc.).

· Reward: Slaying both yields great rewards (presumably double loot + extra).

Node: Greater Nemesis (Below 2x Two)

· Effect: After completing a Nemesis Layer, there is a chance a portal will appear to the Greater Nemesis Layer, where you fight two Greater Lair Bosses.

· Greater Bosses: Duriel and Andariel tier.

· Reward: Slaying both yields great rewards (significantly better than Initiate tier).

Node: Ultimate Nemesis (The Capstone)

· Effect: After defeating all bosses within the Greater Nemesis Layer, the Call of Evil altar appears. Sacrifice 5 Betrayer’s Husks (new summoning material) to open a portal to the Ultimate Nemesis Layer.

· Inside:

o All enemies gain +5 Monster Power (massive difficulty spike).

o Defeating the boss encounter awards 10 Horde Chests worth of items (no additional keys required).

· Note: This isn’t a single boss. The description says “all enemies within” and “boss encounter,” implying adds or phases. It’s likely tied to Bailé (Lord of Hat).

The Nemesis Proc Chain (RNG Flowchart)

1. Kill any normal Lair Boss → Low chance to spawn 2x Two portal.

2. Clear the 2x Initiate Bosses → Higher chance (but not guaranteed) to spawn Greater Nemesis portal.

3. Clear the 2x Greater Bosses (Duriel + Andariel) → Guaranteed Call of Evil altar appears.

4. Pay 5 Betrayer’s Husks → Enter Ultimate Nemesis → Fight juiced (+5 MP) Bailé encounter → 10 chests of loot.

5. Pro Tip: This is the ultimate “jackpot” moment. Builds that excel at multi-target boss DPS and survival will be king here. Expect to fail the first few times.

5. Bottom Tier Nodes (High Investment)

These nodes are located at the very bottom of the tree (brown icons). Their exact positions are unconfirmed, but they are likely high-cost.

Node: Golden Horde

· Effect: All equipment that would drop from Horde Chests is converted to Gold, except for Unique and Mythic items.

· When to use: Gold farming. If you’re drowning in materials but need gold for rerolls or trading, respec to this node temporarily.

Node: Exotic Armory (or Exotic Chest)

· Effect: Horde Chests drop one additional Unique item, but it can be for any class.

· Analysis: This is almost always worth taking. Even with a 1/8 chance to be for your class, it’s still bonus loot. And for Ultimate Nemesis (10 chests), that’s 10 extra Uniques. Insane value.

Final Strategy & Build Path Recommendations

For Pure Efficiency (Farming Keys/Uniques):

· Go Left Side first. Get Lair of Plenty for double chests. Then grab Exotic Armory at the bottom.

For Excitement & Jackpots (The Nemesis Rush):

· Beeline the Middle Section. Unlock 2x Two → Greater Nemesis → Ultimate Nemesis in sequence. This turns every boss kill into a lottery ticket for the ultimate multi-boss fight.

For Content Variety (Avoiding Burnout):

· Invest in Green Nodes. Put Varshan in Infernal Hordes and Bartuc in the Fell Council. You’ll naturally farm boss uniques while doing other activities.

Final Verdict

The Lair Boss Skill Tree in Lord of Hat isn’t just a passive upgrade—it’s a new gameplay system. The Nemesis Layers alone add an “Uber boss rush” mode that Diablo IV desperately needed. Chasing that low-proc portal to fight Duriel and Andariel simultaneously for a shot at a +5 MP Bailé fight with 10 chests of loot? That’s the new endgame dopamine loop. To fully prepare for these intense encounters without breaking the bank, you can find cheap Diablo 4 Items at MMOEXP, ensuring your build is ready for the ultimate Nemesis challenge while you focus on chasing those jackpot portals. Happy hunting, Wanderer!

Diablo 4 Season 11 Adds Azmodan: How to Unlock the Boss Fight

Azmodan has returned to Diablo 4 as a powerful World Boss, bringing with him high-tier loot and challenging gameplay. Unlike other demons who have dedicated lairs, Azmodan roams the Fields of Desecration, making his appearance dependent on the World Boss timer. However, Season 11 introduces the ability to manually summon Azmodan, giving players greater control over when and how they face this formidable foe. In this guide, we’ll cover the step-by-step process to summon Azmodan, the level requirements, and what Diablo 4 items you can expect from defeating him.

Where to Summon Azmodan in Diablo 4

To summon Azmodan, head to the Fields of Desecration, located southeast of Zarbinzet. Here, you’ll find three altars, each representing one of the Lesser Evils:

·Duriel

·Andariel

·Belial

When interacting with any of these altars, a wave of demons will spawn. Once you defeat these minions, Azmodan himself will appear. It’s important to note that the summoning process requires the correct items in your inventory, which we’ll discuss shortly.

Level Requirements and Difficulty

Based on testing in Season 11, Azmodan requires your character to be at least level 60 to summon. Attempts with lower-level characters, even when fighting in Hard mode, failed to trigger his appearance. This requirement makes sense because Azmodan is a World Boss, designed for high-level players seeking endgame content.

Interestingly, the difficulty level does not restrict summoning. Whether you are on Normal, Hard, or Torment difficulty, you can summon him as long as your character meets the level requirement. For faster kills and improved loot, we recommend forming a group with other high-level players, which also provides an excellent opportunity to farm experience points and level up secondary characters.

Items Needed to Summon Azmodan

To perform the summoning, you need to collect specific Corrupted Boss Items corresponding to the Lesser Evil altars:

·Corrupted Claw of Andariel

·Corrupted Eye of Belial

·Corrupted Horn of Duriel

These items can be farmed from previous encounters with the Lesser Evils or obtained through various in-game events. If you prefer a shortcut, players can also buy Diablo 4 materials from other players or marketplaces to complete their collection faster. Having five of the same Corrupted Boss Item allows you to unlock their respective altar, which triggers the summoning sequence.

Fighting Azmodan

Once Azmodan is summoned, the battle begins immediately. His mechanics are multi-phase, combining high-damage attacks, area-of-effect abilities, and summoning waves of minions to overwhelm players.

·Solo Strategy: Attempting Azmodan alone is possible if your character is at max level and well-geared, particularly with high armor, resistances, and damage mitigation items.

·Group Strategy: Coordinating with a team is highly recommended. Players can combine AoE attacks and crowd control skills to manage both Azmodan and his minions efficiently.

Defeating Azmodan rewards you with high-level Diablo 4 items, including random Uniques that scale with your character’s level. Even players facing him at level 60 in pre-Torment difficulties have a chance at unique drops, making him a lucrative target for endgame farming.

Rewards and Loot

After defeating Azmodan, chests appear next to the altars. Each chest corresponds to one of the Lesser Evils and can be opened with the appropriate Corrupted Boss Items. The loot includes:

·Level-scaled gear

·Unique items relevant to your class

·Valuable crafting materials

Additionally, farming Azmodan can yield resources that help craft or upgrade other Diablo 4 items, creating a loop where summoning and defeating him accelerates both gear acquisition and character progression.

Tips for Efficient Summoning

1. Form a group: Even a duo can significantly reduce the difficulty of Azmodan.

2. Prepare Corrupted Boss Items in advance: Collect Diablo 4 materials to avoid last-minute farming.

3. Optimize your loadout: Equip high-damage and high-survivability items to withstand AoE attacks.

4. Monitor the World Boss timer: While summoning manually is available, tracking his natural spawn can allow you to maximize loot drops.

5. Rotate altars: If you want to farm multiple Uniques, rotate through the three Lesser Evil altars for a chance at varied items.

Conclusion

Azmodan in Diablo 4 Season 11 is not only a challenging World Boss but also an excellent opportunity to farm high-tier Diablo 4 items and level up efficiently. By following this guide, you’ll know exactly how to summon him in the Fields of Desecration, understand the level and item requirements, and maximize your loot potential.

Diablo 4 Season 9: How to Farm Obducite in Escalating Nightmares

Reaching the endgame in Diablo 4 is all about maximizing your power. Whether you’re running Nightmare Dungeons, Tormented difficulty content, or farming bosses, your build’s effectiveness ultimately comes down to the quality of your gear. One of the most important systems for this is Masterworking, which allows players to push affixes to higher tiers and fine-tune their stats. However, Masterworking requires Obducite, a rare crafting material that becomes increasingly scarce the further you progress.

Season 9, titled Sins of the Horadrim, introduces Escalating Nightmares, arguably the most efficient Obducite farming system yet. Not only does this content deliver Obducite at a remarkable rate, but it also provides valuable experience, loot, and other Diablo 4 Items essential for building powerful endgame setups. In this guide, we’ll cover why Escalating Nightmares are so effective, the best farming strategies, and tips on optimizing your runs for maximum gain.

Why Escalating Nightmares Are the Best Obducite Farm

Escalating Nightmares are timed, progressively difficult dungeons where enemy density and affix power scale with each wave. The higher you climb, the better your chances of obtaining Obducite, rare Diablo 4 Items, and other high-tier rewards.

What makes them especially effective:

1. Consistent Obducite Drops

·Each completed wave guarantees a minimum amount of Obducite.

·Bonus Obducite is awarded for clearing waves quickly and defeating elite mobs efficiently.

2. Scaling Difficulty for Maximum Efficiency

·Unlike static dungeons, Escalating Nightmares dynamically scale in difficulty, providing better loot and rare Diablo 4 Items the further you climb.

·This makes it possible to tailor runs to your build’s strength.

3. Additional Rewards

·Experience, gold, and crafting materials like Forgotten Souls or Veiled Crystals drop alongside Obducite.

·This multi-resource yield makes each run more profitable and reduces time spent farming individual materials.

Essential Gear and Diablo 4 Items for Farming

Running Escalating Nightmares efficiently requires optimizing your build and Diablo 4 Items. Gear that increases speed, crowd control, and survivability is essential. Here’s a recommended approach:

·High AoE Damage Weapons – Clear waves faster to maximize Obducite earned per minute.

·Cooldown Reduction Armor & Amulets – Allows you to reuse abilities quickly and maintain mobility.

·Legendary Items with Movement Boosts – Dash, teleport, or sprint enhancements help traverse the dungeon more efficiently.

For players who struggle to farm these items naturally, many choose to buy Diablo IV Items from reputable sources. Doing so accelerates your ability to climb Escalating Nightmares and secure Obducite more consistently.

Diablo 4 Materials for Optimization

Optimizing your farm isn’t just about having strong gear-it’s also about using cheap Diablo 4 materials to upgrade or reroll affixes. Materials like Veiled Crystals, Fiend Roses, and Obducite itself are used to:

·Upgrade Legendary items to maximize your damage output.

·Reroll key affixes for faster dungeon clearing.

·Enhance movement speed, survivability, and cooldown reduction.

Stockpiling these materials before tackling higher-tier Escalating Nightmares ensures smoother runs and better returns.

Strategies for Maximum Obducite Gain

1. Prioritize Speed Over Perfection

·Obducite rewards are based on completed waves, not perfection. Don’t linger for perfect loot-focus on clearing waves quickly.

2. Select the Right Waves for Your Build

·Escalating Nightmares allow you to skip waves that are too difficult for your current setup. Choose the waves where you can farm efficiently without dying.

3. Use AoE and Crowd Control

·Builds like Frozen Explosion Sorcerer, Infinimist Necromancer, or Whirlwind Barbarian excel because they clear waves quickly and safely.

4. Team vs. Solo

·While solo runs are viable, forming a team can help reach higher tiers faster. Shared buffs and combined damage make it easier to maximize Obducite drops per run.

5. Reinvest Materials

·Use the Diablo 4 materials gathered to reroll gear before attempting higher-tier waves. Better gear increases your farming efficiency and overall Obducite yield.

Conclusion

Escalating Nightmares are, without a doubt, the best Obducite farm in Diablo 4 Season 9. They combine scaling difficulty, high Obducite rewards, and additional loot like Diablo 4 Items and gold to create one of the most efficient endgame activities. By using the right gear, focusing on fast clears, and supplementing your farm with cheap Diablo 4 materials or even opting to buy Diablo IV Items, you can maximize your Obducite yield and push your builds to their full potential.

Whether you’re a solo player optimizing every run or a team player climbing the ladder for maximum loot, mastering Escalating Nightmares will secure your position among the most powerful adventurers in Sanctuary.

Diablo 4 Season 10:All New Uniques Revealed

A new Diablo season always brings new mechanics, balance changes, and a fresh endgame loop-but few things excite players more than the reveal of new Uniques. These Diablo 4 gold often redefine builds, shake up the meta, and push creative theorycrafting. With Diablo 4 Season 10, each class is set to receive at least one new Unique, offering fresh incentives to revisit old playstyles or pioneer entirely new ones.

While these items are currently on the Public Test Realm (PTR), meaning they may receive adjustments before launch, they give us an exciting preview of what’s to come. Some may get renamed, rebalanced, or slightly reworked-as we saw back in Season 9-but their core identity is already setting the stage for Season 10 theorycrafting season.

Interestingly, several of these appear in Chaos Armor slots, meaning they’re not always locked to the slot they were first revealed in. That flexibility could make them even more accessible and versatile in gearing strategies.

Let’s break down each new Unique, what it does, and how it might shift builds in Diablo 4 evolving meta.

1.Sabre of Tsasgral (Barbarian)

    The Sabre of Tsasgral is a one-handed weapon designed to give Barbarians more incentive to diversify their skill setups. For years, Barbarians have leaned heavily into Shouts and defenses, with only one or two true damaging abilities equipped. This Unique seems to challenge that paradigm.

    This encourages Barbarians to equip more offensive skills and actively rotate them rather than leaning on defensive uptime. It synergizes especially well with Whirlwind, Hammer of the Ancients, and Rend, pushing Barbarians toward a more dynamic, multi-skill playstyle.

    2.Kilt of Blackwing (Druid)

      Druids are getting some serious love in Season 10, particularly for the often-overlooked Raven skill. The Kilt of Blackwing turns this Companion ability into a centerpiece of damage and shapeshifting synergy.

      Ravens have historically been underused, sitting at the bottom of most Druid builds. This Unique not only supercharges their damage but also ties them into shapeshifting and Companion synergies. Expect to see powerful hybrid Druid builds that weave together animal forms and Companion summons.

      3.Gospel of the Devotee (Necromancer)

        Necromancers typically shine with massive two-handers or minion-centric gear, but Season 10 Gospel of the Devotee shifts attention to the often-ignored Basic Skills.

        This could enable a Basic Skill Necromancer, something rarely viable in Diablo 4 endgame so far. For Bone builds in particular, the piercing Bone Splinters combined with vulnerability stacking might make this a sleeper hit. While some Necro players may hesitate to embrace “basic skill builds,” this could finally make them competitive.

        4.Orphan Maker (Rogue)

          With one of the most striking names in the lineup, Orphan Maker is a two-handed crossbow that introduces an entirely new mechanic:Reload.

          Reload introduces a small downtime mechanic-skills temporarily go on hold after firing-but compensates with massive damage multipliers. Combined with Marksman skill bonuses, Vulnerable damage scaling, and a chance to cast skills twice, Rogues may finally reclaim some spotlight in the endgame meta. The sheer burst potential here makes it one of the most exciting additions in Season 10.

          5.Galvanic Azurite (Sorcerer)

            Sorcerers have long relied on Fire Hydra and Frost builds, but Season 10 could mark the return of Lightning dominance. Galvanic Azurite, a Unique ring, encourages clustering enemies and unleashing devastating crackling effects.

            This is one of the most visually and mechanically exciting Uniques revealed so far. Magnetized enemies not only take more damage but also cluster together, amplifying AoE destruction. Combined with skills like Chain Lightning or Ball Lightning, this could become a cornerstone for new top-tier Sorcerer builds.

            6.Hesha e Kesungi (Spiritborn)

              The newest class in Diablo 4, the Spiritborn, is receiving its first round of dedicated Uniques in Season 10. Hesha e Kesungi, a pair of gloves, focuses on empowering Gorilla skills.

              The synergy here is obvious-crowd control plus boss shredding. For Gorilla-based builds, this adds a much-needed damage steroid that applies not just to trash mobs but also to bosses, making it a serious contender for Spiritborn endgame setups.

              If these items retain their PTR properties, it would be worthwhile for players to cheap Diablo IV Items. So that Season 10 could be one of the most diverse and experimental seasons yet in Diablo 4.

              Every Diablo season brings excitement, but Diablo 4 Season 10 feels like it’s aiming directly at the heart of build diversity. These Uniques don’t just offer raw power-they encourage players to try forgotten skills, adopt new mechanics, and rethink how classes are itemized.

              Blizzard is Finally ‘Talking About’ Adding One of Diablo 4’s Most Requested Features

              Since its release in June 2023, Diablo 4 has taken the gaming world by storm, combining dark lore, brutal combat, and extensive multiplayer experiences. However, while the game has received rave reviews for its world-building, character progression, and expansive endgame content, players have also voiced concerns and suggested improvements to make their experience even better. Among the most talked-about issues in the community, one feature has stood out as a glaring omission: the ability to trade gear with other players.

              For a game deeply rooted in the tradition of loot-based progression, it seemed unusual that Diablo 4 did not launch with a robust system for trading rare and legendary gear between players. This feature, which has been a staple in the Diablo series for years, was missing at launch, and players quickly began voicing their desire for its return. After months of silence, Blizzard is finally “talking about” the possibility of adding it to the game, sparking a wave of speculation and excitement in the community.

              In this article, we’ll dive into the trade-related discussion, what players have been asking for, Blizzard’s response, and how the inclusion of such a feature could impact Diablo 4’s overall player experience. Understanding this article will help you get Diablo 4 Gold and other rewards more easily in the game.

              The Missing Trade System: A Long-Standing Tradition in Diablo

              One of the defining aspects of the Diablo franchise has always been its focus on loot. Players dive into dungeons, slay enemies, and collect a vast array of weapons, armor, and magical items. In previous titles, such as Diablo II and Diablo III, players could trade these items with one another, enhancing the community-driven experience. The excitement of finding a rare item only to pass it on to a friend or trade it for something better was an integral part of the Diablo experience.

              However, when Diablo 4 was launched, many fans were surprised to find that while the game features a robust loot system, it lacked a full-fledged trading mechanic. Players could exchange items within their own parties or groups, but there was no larger system in place for players to freely trade with anyone in the world. Instead, the game relied on a marketplace-style system where players could buy and sell items to NPCs or participate in a restricted, limited trade system.

              This omission sparked backlash, especially from long-time fans who had come to expect a more open and dynamic loot economy. Many players voiced frustration over the inability to freely exchange their hard-earned loot or find specific items from friends and allies. The lack of an unrestricted trade system felt like a step backward for a series known for its player-driven economy.

              Blizzard’s Initial Position: A Focus on Item Integrity

              Blizzard’s initial stance on not including full-fledged trading was rooted in a desire to preserve the game’s integrity. According to developers, Diablo 4’s world and progression system were designed to emphasize individual achievement. The concern was that unrestricted trading could lead to players bypassing the intended progression and skill curve, particularly when it came to high-end gear.

              The studio was also mindful of the potential for item duplication exploits or other forms of cheating that could disrupt the game’s balance. By limiting trading options, Blizzard hoped to maintain a fair and competitive environment for everyone, ensuring that loot was earned through gameplay rather than by relying on others to give or sell rare items.

              Despite these well-intentioned goals, the decision to restrict trading caused frustration in the community, and the lack of communication about the system’s potential future felt like a missed opportunity for many players who were eagerly awaiting improvements.

              Blizzard Finally Listens: “Talking About” the Future of Trading

              In recent months, however, Blizzard has begun to acknowledge the growing demand for an expanded trading system. During live streams, official forums, and community interactions, the developers have openly discussed the possibility of implementing a more dynamic and flexible trading system. While the specifics are still up in the air, Blizzard has confirmed that it is “talking about” bringing the feature into Diablo 4 in future updates.

              In a recent developer update, Diablo 4’s game director, Rod Fergusson, addressed fan concerns regarding trading. While he didn’t provide concrete details or an exact timeline, he emphasized that Blizzard was aware of the desire for a more robust trading system and that the development team was actively working on solutions that would keep the game’s integrity intact while also satisfying the player base’s wishes.

              Fergusson noted that there were a lot of considerations when it came to adding trading, from balancing item rarity to preventing exploits. He mentioned that Blizzard was keen on making sure any potential trade system would not undermine the difficulty and progression of Diablo 4’s core loop. However, he reassured fans that the company was committed to making changes based on community feedback, suggesting that the feature might come sooner rather than later.

              What Could a Full Trading System Look Like in Diablo 4?

              While Blizzard has remained tight-lipped about the specifics, there are several directions in which the trading system could evolve. Here are a few possibilities that could make their way into Diablo 4:

              1. Player-to-Player Trading with Restrictions

              One likely scenario is a system where players can trade directly with one another, but with some restrictions to preserve balance. This could include limits on trading high-level gear or cheap Diablo 4 Items that were acquired in specific ways, ensuring that trading doesn’t break the progression curve. For example, legendary items might only be tradable within certain level brackets or require a specific in-game achievement to be unlocked before they can be exchanged.

              2. Auction House or Marketplace Integration

              Another possibility is the return of an auction house-style feature, where players can list items for sale to other players. This could allow for a player-driven economy while maintaining some control over the balance of the game. In this model, the developers might impose fees or taxes on transactions to prevent players from accumulating vast fortunes too quickly or flooding the market with overpowered items.

              3. Shared Loot Pools for Parties or Guilds

              For players who want to share gear within a specific group, Diablo 4 could implement a shared loot pool feature. In this system, players in the same party or guild could exchange gear within a designated pool, ensuring that they can freely share items without necessarily opening up trading to the wider world. This could be a more controlled version of trading that allows groups to benefit from each other’s loot without disrupting the larger economy.

              4. Controlled Trading for Seasonal and Endgame Content

              One of the more intriguing possibilities is a seasonal trading system. Blizzard could introduce special events or seasons where trading is unlocked for a limited time, either with specific items or under certain conditions. This could give players the flexibility they desire while maintaining a sense of balance and seasonal progression.

              The Impact of Trading on Diablo 4’s Endgame

              If implemented correctly, a trading system could have a profound impact on Diablo 4’s endgame content. Players would be able to obtain gear they might otherwise struggle to find, whether by farming specific bosses or completing high-difficulty dungeons. This would allow for greater customization of characters and help smooth out the grind for rare or unique items.

              Additionally, an active trading system would encourage player interaction, potentially boosting the longevity of the game. Players could engage in a thriving marketplace, exchanging valuable items or crafting materials, thus creating a dynamic and constantly evolving player-driven economy.

              On the flip side, there are concerns that unrestricted trading could lead to problems with power creep, where players could simply trade their way to the top without earning their gear. Blizzard would need to implement safeguards to ensure that trading doesn’t overshadow the importance of gameplay and exploration.

              Conclusion: A Promising Future for Diablo 4’s Trading System

              While Blizzard’s recent discussions about adding a trading system to Diablo 4 have not yet materialized into concrete details, the fact that the company is finally acknowledging the demand is a promising sign for the game’s future. A more flexible, player-driven economy could add depth and excitement to the Diablo 4 experience, as long as it’s balanced carefully to preserve the integrity of the game.

              As Blizzard continues to listen to the community and fine-tune the game’s systems, the addition of a trading feature could mark a significant turning point for the Diablo franchise. Whether it’s a full-fledged auction house, direct player-to-player trades, or seasonal events that unlock trading for limited periods, players can look forward to a future where their loot isn’t just something to hoard but a valuable resource that can be shared, bartered, and exchanged.

              With ongoing updates and the promise of community-focused development, Diablo 4’s best days may still be ahead-especially if it delivers one of the most requested features the fanbase has been eagerly waiting for.

              Diablo 4: Speed Leveling Guide

              Diablo 4 is a highly anticipated action RPG from Blizzard Entertainment, offering players an expansive open world, thrilling combat, and a deep story rooted in the series’ signature dark fantasy. With the vast array of features and classes available, players are eager to level up their characters as quickly as possible to access the game’s most rewarding content. Whether you’re aiming to play solo or with friends, efficient leveling is a key component of making the most of your Diablo 4 experience.

              In this speed leveling guide, we’ll discuss everything from optimal character builds to strategies for maximizing your XP gains and taking full advantage of the game’s features. If you’re looking to blast through levels quickly and efficiently, keep reading!

              1. Choose the Right Class for Speed Leveling

              Your class choice is pivotal to leveling speed. Each class in Diablo 4 offers distinct advantages and playstyles, and some are more suited for fast leveling than others. Here are the most common picks based on the speed of leveling:

              Sorcerer: The Sorcerer excels at dealing massive area-of-effect (AoE) damage, which is great for clearing large packs of enemies quickly. Their ability to deal high burst damage while maintaining mobility allows them to plow through content faster than other classes. With the right build, Sorcerers can quickly clear dungeons and world events, gaining substantial XP.

              Rogue: Rogues are fast and versatile, offering both ranged and melee options. With their ability to quickly move around the battlefield and execute powerful critical strikes, they are one of the fastest classes for leveling. Their mobility is key for running through areas, killing enemies swiftly, and avoiding dangerous situations.

              Barbarian: The Barbarian is all about brute force. While they lack the high mobility of the Rogue or Sorcerer, their sheer tankiness and ability to deal with multiple enemies at once make them a solid choice for speed leveling. Their resource management is also relatively simple, and with the right build, they can plow through mobs and elite packs quickly.

              Necromancer: Necromancers are one of the best classes for speed leveling if you enjoy using summons. Their ability to raise the dead and create an army of minions allows them to focus on other aspects of the game, such as exploring and looting, while their minions do most of the fighting. A minion build can greatly speed up leveling by allowing you to deal with larger groups of enemies efficiently.

              Druid: Druids offer versatility and tankiness. Their ability to transform into a Werewolf or Werebear makes them well-suited for farming large groups of enemies. While they aren’t as fast as Sorcerers or Rogues, they offer a good balance of speed and survivability, making them a decent choice for solo leveling.

              Each of these classes can level quickly when optimized for speed, but the Sorcerer and Rogue tend to be the most popular due to their high mobility and AoE damage potential.

              2. Optimizing Your Build for Speed Leveling

              Once you’ve selected your class, the next step is to optimize your build for speed leveling. Each class has its own skill tree, and you can specialize in different talents, abilities, and passive buffs. For efficient leveling, you’ll want to focus on maximizing your damage output, mobility, and survivability. Here’s a breakdown of how to approach your build:

              Key Focus Areas for Speed Leveling:

              Damage: The faster you can kill enemies, the faster you’ll level. Choose abilities that deal AoE or have high single-target damage, depending on your playstyle. For Sorcerers, skills like Meteor and Chain Lightning are perfect for clearing mobs, while Rogues can benefit from skills like Rapid Fire and Shadow Step for quick escapes and damage.

              Mobility: Speed leveling is all about moving quickly through areas. Build into movement-enhancing skills or passives. For example, Rogues benefit from skills like Dash or Flurry, while Sorcerers can teleport across the map with Teleport. Even Barbarians and Druids can focus on improving movement with skills like Charge and Sprint.

              Survivability: While speed is the goal, dying repeatedly can slow you down significantly. Focus on passive bonuses that enhance your resistance or healing. For instance, Sorcerers should invest in shield-generation abilities like Ice Armor. Meanwhile, Barbarians benefit from increased health regeneration and armor boosts.

              Resource Management: Managing your character’s resource pool (mana, energy, fury, etc.) is crucial for maintaining a steady flow of damage output without getting caught in a lull. Some classes, such as Sorcerer, need to manage mana effectively, while the Barbarian can focus on fury generation. Consider abilities that help you generate or spend resources quickly.

              Example Builds for Speed Leveling:

              Sorcerer: Maximize your AoE abilities and crowd control. Focus on Fireball, Chain Lightning, and Meteor for damage. Combine these with mobility spells like Teleport to quickly escape danger and reposition yourself. Ensure you have good energy regeneration through Mana Shield or similar passives.

              Rogue: Focus on a hybrid of ranged and melee abilities. Use Rapid Fire or Flurry for quick AoE damage, and enhance your movement with Dash or Shadow Step. Building critical strike chance and damage through the Subterfuge skill tree will also help you clear enemies faster.

              Barbarian: Build for maximum AoE damage and survivability. Skills like Whirlwind or Earthquake are great for clearing mobs. You should focus on increasing your Fury generation and spend it on powerful abilities that let you deal high damage while remaining tanky.

              Necromancer: Focus on summoning minions and using corpse explosion abilities. Your minions will automatically fight enemies, allowing you to focus on exploring and looting. Abilities like Raise Skeletons and Army of the Dead will bolster your forces, and Corpse Explosion can clear large packs of enemies quickly.

              Druid: Use your shapeshifting abilities to maximize mobility and damage. Focus on Werewolf for speed and Werebear for tanking. Ensure you have plenty of skills that scale with your shapeshifting abilities and look for passives that increase your movement and damage mitigation.

              3. Maximize XP Gains through Events and Dungeons

              In Diablo 4, certain activities provide more experience points than others. To level efficiently, you should prioritize content that maximizes XP gains and minimizes downtime. Here are some tips for optimal XP farming:

              World Events: Diablo 4 introduces dynamic world events that occur in various regions. Participating in these events provides substantial XP rewards, and many of these events involve fighting waves of enemies or bosses. Completing these events quickly can net you a large amount of XP without much downtime.

              Dungeons: Dungeons are a core part of Diablo 4’s gameplay, offering an array of enemies and bosses that reward you with high XP and valuable loot. However, they can take longer than other activities, so it’s important to prioritize faster dungeons. Look for dungeons with large groups of enemies that you can clear quickly, and make sure you’re completing dungeon objectives for maximum XP.

              Bounties: Completing bounties is a great way to gain XP passively. These mini-quests can be completed while you’re out exploring the world, and they often reward you with experience, Diablo 4 Gold, and loot. Prioritize bounties that take place in areas with a high density of enemies.

              Elite Packs: Keep an eye out for elite packs of enemies that are tougher but give more XP when defeated. These are often found in dungeons, world events, or random areas of the open world. Focus on elite packs if you’re looking for a big XP boost in a short amount of time.

              4. Optimize Your Gear

              While leveling, it’s important to focus on gear that enhances your speed and survivability. Prioritize items that:

              Increase your damage output (especially AoE damage)

              Boost your movement speed

              Offer defensive stats like resistance, armor, or health regeneration

              Use crafting and enchantment systems to upgrade your gear as you progress, and don’t be afraid to replace your gear frequently. Since Diablo 4 is all about progression, staying ahead of the curve in terms of item quality is essential for efficient leveling.

              5. Multiplayer and Coop Play

              Leveling with others in a cooperative setting can significantly increase your speed. Diablo 4 supports multiplayer play, so joining a group of like-minded players can allow you to clear areas more quickly, especially during difficult sections of the game. Additionally, cooperative play can provide shared XP rewards, meaning everyone in the group benefits from the kill.

              While solo leveling is certainly possible, playing with others can help clear larger packs of enemies and take down harder bosses more quickly.

              Conclusion

              Speed leveling in Diablo 4 is all about optimizing your character’s build, focusing on high-XP activities, and mastering the game’s systems. By choosing the right class, building for maximum damage and mobility, and taking advantage of world events, dungeons, cheap Diablo 4 Items, and elite packs, you’ll be on your way to reaching max level in no time. Remember, leveling is not just about speed; it’s about having fun and enjoying the adventure along the way. Keep experimenting with different strategies, builds, and playstyles to find what works best for you. Happy hunting!

              Mmoexp Diablo 4 2.2.0 Patch Notes: In-Depth Breakdown & Player Impact

              The 2.2.0 patch for Diablo 4 is a major update that brings sweeping changes across many facets of the game, including skill balancing, monster tuning, and quality-of-life improvements. This patch reflects Blizzard’s ongoing commitment to refining gameplay and addressing community feedback, especially around combat balance and class performance.

              Let’s dive into the major highlights, focusing on what’s new, what’s been nerfed or buffed, and how it impacts your gameplay and build choices.

              Vessel of Hatred & Rune Words Changes

              One of the notable changes is to the Vessel of Hatred skill and associated Rune Words like Xan, Tec, and others:

              The Xan rune’s duration increased from 0.25 to 0.35 seconds. Previously, this rune boosted damage; now it enhances the duration of the effect instead. This subtle change may shift how players time their attacks and coordinate burst damage windows.

              Tec rune damage was reduced from 1000% to 700%, signaling a nerf to this powerful damage rune, but still keeping it viable for burst scenarios.

              The Spiritborn class saw the Aspect of Apprehension move from Utility to Offensive, which may make this aspect a more aggressive choice for builds that focus on direct damage rather than defensive utility.

              Damage buffs to Spiritborn’s Rushing Claw (from 60% to 80%) and Sepazontec (from 50-100% to 80-130%) suggest an overall push to improve Spiritborn’s offensive potential. Similarly, Sunbird’s Gorget received a damage increase and a functional change – it now makes your Storm Feathers a Jaguar Skill, adding new synergy and combo potential.

              These changes make Spiritborn more versatile, encouraging players to experiment with aggressive builds that leverage these buffs and new mechanics.

              Boss & Monster Changes: Belial, Harbinger, Urivar, Duriel, and More

              Bosses and monsters have been rebalanced, mostly with damage reductions to make fights more manageable:

              Belial’s Return sees significant nerfs: Flaming Skull damage is drastically cut (from 1800% to 450%), and related DoT bonuses are halved. The Eye Beams have fewer beams and less damage, plus shorter durations, which reduces the difficulty spike of this fight.

              The Harbinger of Hatred’s Volley and Urivar also have damage reductions and cooldown adjustments, smoothing out difficulty and reducing frustration from rapid damage bursts.

              Duriel’s Burrow damage halved, but dodge duration increased significantly (2 to 5 seconds), rewarding better dodging and positioning rather than tanking through damage.

              Sinerat’s damage drastically reduced from 200% to 50%, signaling an attempt to make encounters more balanced.

              These nerfs aim to strike a better balance between challenge and fairness, especially for solo players or those with less optimized gear.

              Skill & Modifier Adjustments: Fine-Tuning Combat

              Many primary powers and modifiers across various monsters and skills have been tuned:

              For example, Avarice’s damage bonus per resource point is dramatically decreased, which could change the viability of resource-heavy playstyles.

              Lilith has been buffed, with an increase in primary power damage and adjustments to the Blisters mechanic (capping their number per elite or boss, and limiting execution conditions), streamlining the encounter while retaining challenge.

              The Wandering Death’s Chest Beam and Blackmailer’s Sabotage have had damage and barrier amounts adjusted to reduce overwhelming damage spikes and give players more breathing room.

              Many primary powers now have cooldowns added (like Urivar’s 1-second cooldown), preventing skill spamming and encouraging strategic use.

              Class Changes: Barbarian and Druid Updates

              Barbarian:

              Core abilities like Whirlwind get a significant damage boost (32% to 52%), and the Furious Whirlwind bleed damage triples, making Whirlwind builds more potent.

              Resource costs for Double Swing, Hammer of the Ancients, Upheaval, and Rend are lowered, increasing the Barbarian’s sustained damage potential by enabling more frequent skill use.

              Some abilities like Warrior’s Mighty Throw see damage bonuses sharply reduced, reflecting a rebalancing to favor core melee abilities.

              Utility and combo skills like Steel Grasp received damage increases and charge boosts, making the Barbarian more resilient and impactful in combat.

              Executioner’s Aspect damage per strength was reduced and capped, which tempers scaling but keeps it meaningful for burst damage builds.

              Druid:

              Storm Strike’s chain acquisition radius increased by 50%, meaning it can hit more targets and better clear packs.

              Defensive buffs like Cyclone Armor get a boost in non-physical resist (15% to 20%), enhancing survivability against elemental attacks.

              What These Changes Mean for You

              This patch is designed to create a smoother, more balanced gameplay experience by:

              Reducing extreme damage spikes from bosses and monsters, making encounters fairer and less punishing.

              Buffing certain class skills and runes, particularly for Spiritborn and Barbarian, empowering players to experiment with new builds.

              Adding cooldowns and damage caps to prevent skill spam and encourage tactical play.

              Tuning utility skills and modifiers to improve synergy and effectiveness without overwhelming players.

              Improving QoL and consistency, which helps with bug fixes and skill descriptions.

              How to Adapt Your Gameplay

              Spiritborn players should revisit builds that leverage the increased damage and utility of new runes and aspects. The shift in the Aspect of Apprehension’s category means rethinking skill trees and offensive capabilities.

              Barbarians can confidently use Whirlwind and Furious Whirlwind in their rotations due to damage and cost adjustments, enabling better clear speed and DPS output.

              Boss fights have been softened; this could be a great time to re-run tougher encounters for better loot or progress in Seasons without as much risk.

              Keep in mind that cooldowns added to monster powers may allow for more tactical dodging or positioning during fights.

              Final Thoughts

              Diablo 4’s 2.2.0 patch is a significant step toward improving game balance and player experience. By cutting down boss damage, buffing certain class abilities, and streamlining skill mechanics, Blizzard encourages players to explore new builds and strategies without facing frustrating roadblocks.

              And hey, if you’re interested, I can also point you to reliable sources for buying Diablo 4 gold and Diablo 4 items safely, so you can power up faster without hassle.

              Dust Daisy – Diablo 4 Guide

              Diablo 4, the latest installment in Blizzard’s iconic action RPG franchise, is packed with a variety of mechanics, systems, and items that contribute to the game’s immersive experience. Among these, “Dust Daisy” is one of the lesser-known but highly useful items that players may encounter while exploring the world of Sanctuary. Whether you are a seasoned player or a newcomer, understanding what Dust Daisy is and how it fits into the broader context of the game can help improve your efficiency and enjoyment. This guide delves into the importance of Dust Daisy, where to find it, and how it can be used to enhance your gameplay.

              What is Dust Daisy?

              Dust Daisy is a type of crafting material in Diablo 4 that plays a crucial role in various in-game systems, primarily in the crafting and upgrading of gear. Like many other rare crafting materials, it’s a commodity you can find during your adventures in Sanctuary, especially in certain regions and under specific conditions. While its uses are a bit niche, it holds the potential to significantly boost your progression in the game once you understand its applications.

              Dust Daisy is not just a random item – its presence is tied to a specific set of gameplay mechanics that make it an essential item for certain builds, strategies, and crafting recipes. Understanding when and where to look for Dust Daisy can be the difference between creating powerful upgrades or missing out on essential bonuses.

              Where to Find Dust Daisy

              Finding Dust Daisy in Diablo 4 is not as straightforward as picking up standard items like potions or health globes. Dust Daisy typically spawns in specific regions of Sanctuary, with a few notable places being more abundant in this crafting material.

              Here are some tips on where to look for Dust Daisy:

              Loot Chests and Piles: Dust Daisy can often be found in chests scattered across the world or within specific dungeons. If you’re exploring an area known for high-level enemies or rare loot, there’s a good chance that Dust Daisy will be part of the loot pool.

              Elite and Boss Fights: Defeating elite enemies or bosses may drop Dust Daisy, especially when these enemies are part of events or quests that require additional challenges.

              World Events: Participating in world events or larger group activities may grant you Dust Daisy as a part of the rewards. These activities tend to be more rewarding and often come with a variety of materials, including Dust Daisy.

              Specific Locations: Some specific zones in Sanctuary are known to have an increased chance of Dust Daisy spawns. Areas with dense mob populations and difficult terrain typically drop higher-quality materials, including Dust Daisy.

              As always, if you want to optimize your chances of finding Dust Daisy, consider consulting community guides, forums, or maps that highlight areas with increased chances of gathering Diablo 4 materials.

              Uses of Dust Daisy

              While Dust Daisy may not be the first item you think about when it comes to key crafting materials, its uses are quite impactful. Here are the main ways Dust Daisy can be used:

              1. Crafting Gear Enhancements

              Dust Daisy can be used in upgrading or enhancing your gear. Whether it’s crafting new items or improving the stats of existing gear, Dust Daisy plays a significant role in ensuring you get the most out of your loot. Certain end-game crafting recipes call for this item to upgrade gear for specific character builds.

              Enhancement: You might need Dust Daisy when applying enhancements to weapons, armor, or accessories. These enhancements could offer additional damage bonuses, resistances, or special properties depending on the type of enhancement you’re trying to apply.

              Re-Rolling Stats: If you’ve found a piece of gear with perfect base stats but want to re-roll some of its secondary attributes (like adding more elemental damage or critical hit chance), Dust Daisy may be a required ingredient to reroll these stats.

              2. Alchemical Potions and Buffs

              In addition to enhancing gear, Dust Daisy can be used in the crafting of powerful potions and buffing items. Potions crafted with Dust Daisy may grant temporary stat boosts or effects that provide combat advantages. This includes buffs like increased movement speed, enhanced regeneration, or resistance to elemental damage.

              Some potions can also work in synergy with your gear to increase damage dealt or reduce incoming damage for a limited time, making Dust Daisy a valuable resource in difficult battles, such as those against world bosses or high-tier dungeon runs.

              3. Quests and Progression

              Certain quests or story missions within Diablo 4 may require you to collect Dust Daisy as part of progression. These quests might be related to the game’s crafting system or may involve enhancing your gear to face off against tougher challenges.

              Completing these quests may not only provide you with Dust Daisy as a reward but may also unlock advanced crafting recipes that take advantage of this material, opening up new possibilities for your character’s build.

              4. Special Vendor Recipes

              Some vendors in Diablo 4 offer unique recipes that can only be purchased using Dust Daisy as one of the ingredients. These recipes might offer items or buffs that you won’t find anywhere else in the game, making Dust Daisy an important item to keep in your inventory.

              These exclusive items typically cater to more specialized builds, giving you an edge in particular aspects of the game, such as crowd control or survivability. If you’re aiming for a specific strategy or end-game gear setup, Dust Daisy might be the key ingredient that helps you achieve your goals.

              Best Practices for Managing Dust Daisy

              Dust Daisy might be a rare commodity in Diablo 4, so it’s important to manage it effectively. Here are some best practices:

              Stockpile for Crafting: Keep a reserve of Dust Daisy in your inventory. Since it’s often used in crafting and upgrading, having a stash will allow you to quickly take advantage of upgrades and enhancements without having to grind for it every time.

              Evaluate the Crafting System: Before spending Dust Daisy on crafting or upgrading gear, carefully evaluate whether the item you’re working on will improve your character’s build. There’s no sense in wasting resources on gear that doesn’t offer meaningful benefits for your strategy.

              Balance with Other Materials: Dust Daisy is just one of many materials in Diablo 4, so it’s essential to balance its use with other important crafting materials like Silver, Essences, or Legendary crafting materials. Prioritize materials that complement your build and progression.

              Sell or Trade: If you find yourself accumulating more Dust Daisy than you need, consider trading or selling it at vendors or within the in-game economy (if applicable). Certain player-to-player trade systems may allow you to offload excess materials for cheap Diablo 4 Items.

              How Dust Daisy Affects Endgame Builds

              As you progress into the endgame content of Diablo 4, Dust Daisy’s role becomes increasingly vital. Endgame builds often require specific crafting materials for optimal performance. Depending on your chosen class and playstyle, the additional buffs and enhancements made possible by Dust Daisy can make the difference between dominating your enemies and falling short.

              For example:

              High-Damage Builds: Characters that focus on dealing as much damage as possible can benefit from enhancements that increase their critical hit chance or elemental damage. Dust Daisy can be crucial in re-rolling gear stats to perfect these attributes.

              Tank Builds: For characters focused on survivability, Dust Daisy can be used to craft potions or enhancements that increase your resistance to damage, healing received, or crowd control resistance.

              Utility Builds: Characters who focus on debuffing enemies or providing utility in team play can use Dust Daisy to craft gear that offers increased utility stats, such as area-of-effect damage or crowd control abilities.

              Conclusion

              While Dust Daisy might not be the flashiest or most obvious item in Diablo 4, its importance should not be underestimated. Whether you’re crafting powerful gear, enhancing potions, or participating in key quests, this material is integral to progression in Diablo 4. As you continue your journey through the dark and unforgiving world of Sanctuary, make sure to collect and utilize Dust Daisy to its fullest potential.

              By knowing where to find it, how to use it, and when to craft with it, you can optimize your experience and develop a much stronger character to tackle the toughest challenges that lie ahead. Remember to keep your eyes open for this valuable material on your journey, as it may be the key to your next big upgrade or success. Happy hunting, adventurer!

              Diablo 4: What Main Quest Act Should You Choose First?

              Diablo 4 is a massive action RPG set in the dark, demon-infested world of Sanctuary. As you embark on your journey to battle the forces of Lilith and the Prime Evils, you’ll experience an intricate storyline spread across five distinct Acts. Each Act introduces new challenges, characters, and environments that bring different elements to the overarching narrative.

              For newcomers and seasoned veterans alike, Diablo 4’s branching path can feel overwhelming, and one of the primary questions new players often ask is: Which Main Quest Act should you choose first?

              In this article, we’ll explore the five Acts of Diablo 4 Gold and offer insight into which one is the best to start with based on your playstyle, goals, and experience level. Whether you’re a Diablo veteran looking to jump into the action or a first-time player, we’ll help you determine where to begin your adventure in Sanctuary.

              Diablo 4: Act Breakdown

              Before discussing which Act to start with, let’s go over the five Acts that make up Diablo 4. Each Act represents a distinct region of Sanctuary, each filled with its own story, lore, enemies, and challenges.

              1. Act 1: The Fractured Peaks

              Overview: The Fractured Peaks is the first area you’ll encounter in Diablo 4. This snow-covered, mountain terrain introduces players to the mechanics of the game, including combat, exploration, and questing. Here, you’ll learn about the rise of Lilith, the Daughter of Hatred, and begin your journey into the world of Sanctuary.

              Key Features:

              Introduction to Diablo 4’s Mechanics: If you’re new to Diablo or action RPGs in general, Act 1 is the perfect starting point. The region is designed to ease you into the game’s core systems, such as combat, skill progression, and exploration.

              Story Foundations: This Act sets the foundation for the main story of Diablo 4, introducing you to Lilith, a key antagonist, and establishing the central conflict that will unfold throughout the game.

              Variety of Environments: The Fractured Peaks offers a mix of snowy hills, dark caves, and human settlements. It’s a balanced environment that sets the tone for what’s to come.

              2. Act 2: The Scosglen Coast

              Overview: The Scosglen Coast is a coastal region full of mystery, supernatural elements, and dark forests. It’s here that you’ll begin to uncover more about the ancient Druidic tribes and their connection to the forces of evil in Sanctuary.

              Key Features:

              Mystical Atmosphere: Act 2 introduces more supernatural and eerie themes. The environment features mist-covered landscapes, ancient ruins, and forested areas. It offers a more atmospheric experience compared to Act 1.

              New Enemies: While Act 1 introduces basic monsters, Act 2 ups the difficulty and brings in more diverse and powerful enemies, including shapeshifting druids and corrupted wildlife.

              A Shift in Tone: The Scosglen Coast shifts away from the more traditional setting of Act 1 and leans into the occult and mystical lore of Sanctuary.

              3. Act 3: The Dry Steppes

              Overview: The Dry Steppes is a vast desert region full of ancient ruins, sandstorms, and extreme environments. This area presents a stark contrast to the snow-covered peaks and coastal forests of previous Acts, offering a more barren, hostile world for players to explore.

              Key Features:

              Increased Difficulty: The Dry Steppes is one of the more difficult regions in Diablo 4, with larger, more aggressive enemies and challenging combat scenarios.

              Desert Environment: The environment is a massive, arid desert, full of ruins and nomadic tribes. The harsh conditions mirror the brutal nature of the challenges you’ll face here.

              Focus on Warriors and Factions: This Act focuses more on the conflicts between different factions and the ancient history of Sanctuary. Expect to see large-scale battles and tough enemies in this region.

              4. Act 4: Kehjistan

              Overview: Kehjistan is a land of forgotten knowledge and ancient ruins. This area features a more traditional desert environment but with a deeper focus on the lost civilizations that once inhabited Sanctuary. This Act is steeped in the mythology of Sanctuary’s past and its ancient conflicts.

              Key Features:

              Historical Depth: Kehjistan introduces a rich historical narrative and dives into the ancient past of Sanctuary. Players will encounter ruins, powerful artifacts, and the legacies of long-dead civilizations.

              Tougher Enemies: The combat becomes even more brutal here, with stronger enemies and more complex mechanics that will test your skills.

              Lore-Focused: If you love lore and discovering the hidden truths behind the world’s mythologies, Act 4 offers plenty of secrets to uncover.

              5. Act 5: The Great North

              Overview: The Great North is the final Act of Diablo 4. It’s a cold, unforgiving region where the final confrontation with Lilith and the forces of darkness will unfold. Players who reach this area are gearing up for the epic conclusion of the story.

              Key Features:

              Climactic Conclusion: Act 5 brings the story to a head, culminating in epic battles and final confrontations with Lilith’s forces.

              Extreme Difficulty: This Act is intended for high-level characters and offers some of the game’s most challenging content.

              Epic Atmosphere: The Great North is cold, rugged, and grim—an environment that sets the stage for an all-out war against the Prime Evils.

              Which Main Quest Act Should You Choose First?

              Now that you have an understanding of what each Act offers, it’s time to consider which one to start with. The choice largely depends on your playstyle, your level of experience with Diablo games, and what you want out of your first playthrough.

              For New Players: Act 1 – The Fractured Peaks

              Best For: Newcomers to Diablo, players unfamiliar with action RPGs

              If you’re new to the Diablo series or action RPGs in general, Act 1 is undoubtedly the best place to start. It introduces the core mechanics of the game in a way that’s manageable and accessible, allowing you to get comfortable with the combat, skills, and exploration before diving into more difficult content. The story foundations are laid here, and while it’s not the most difficult Act, it offers enough variety and interest to keep you engaged.

              In this Act, you’ll also encounter the basic enemies and quests that will prepare you for what’s to come in later Acts. It’s ideal for players who want to take things slow and experience the game’s lore and mechanics step-by-step.

              For Players Looking for Lore and Atmosphere: Act 2 – The Scosglen Coast

              Best For: Fans of supernatural themes, players who enjoy a darker, more atmospheric experience

              If you’re a player who enjoys a deeper, more atmospheric experience, Act 2 is a great choice. It shifts the narrative towards the more mystical and occult aspects of Diablo 4, introducing you to the Druidic culture and their connection to the forces of evil. The environment in Act 2—foggy forests and ancient ruins—sets the stage for a darker, more eerie tone.

              Players who appreciate a strong focus on lore and enjoy exploring deeper mysteries of the world will find Act 2 particularly engaging. However, it’s also a more challenging Act, so it’s better suited for players who are already comfortable with basic gameplay mechanics.

              For Experienced Players: Act 3 – The Dry Steppes

              Best For: Veteran players, those looking for increased difficulty and a more hostile environment

              Act 3 brings a significant increase in difficulty, with stronger enemies, complex mechanics, and larger-scale battles. This Act is perfect for players who have already learned the basics and are looking for a more intense experience. The desert environment of the Dry Steppes is harsh, and the enemies are unforgiving, so it will test your skills and tactics.

              If you’re an experienced Diablo player, Act 3 offers a challenge that keeps the gameplay fresh and engaging. It’s also a great way to continue learning the deeper mechanics of the game as you face off against more dangerous enemies.

              For Lore Enthusiasts: Act 4 – Kehjistan

              Best For: Players who love deep lore, history, and uncovering ancient secrets

              If you’re a lore enthusiast, Act 4 is your playground. This region dives into the ancient history of Sanctuary and introduces long-forgotten secrets that tie into the overarching narrative. It’s ideal for players who love to immerse themselves in the world of Diablo 4 and uncover hidden truths about its mythos.

              While Act 4 isn’t as difficult as Act 5, it still presents tough challenges and intriguing stories, making it a solid choice for those who want to dive deep into the game’s backstory while facing slightly more demanding gameplay.

              For Completionists and Story Seekers: Act 5 – The Great North

              Best For: Completionists, players interested in the epic conclusion, and high-level content

              If you’re a player who’s committed to experiencing the game’s ultimate conclusion, Act 5 is where you’ll want to head once you’ve progressed through the earlier Acts. It offers a climactic end to the story and some of the most difficult challenges in the game. However, this Act is best suited for players who are at a higher level and ready to face some of the game’s most intense combat scenarios.

              Conclusion: The Right Act for Your First Playthrough

              The Act you choose in cheap Diablo 4 Items depends on what you’re looking to get out of your experience. For new players, Act 1 provides a safe and enjoyable introduction. Act 2 offers a darker, more mystical atmosphere, while Act 3 provides a more challenging experience for seasoned players. If you’re a lore lover, Act 4 will immerse you in the ancient history of Sanctuary, and Act 5 will deliver an epic conclusion to your journey.

              Ultimately, no matter which Act you choose, Diablo 4 offers a rich and dynamic experience that will keep you engaged from start to finish. Choose wisely, and prepare for an unforgettable adventure!